There's just something truly special about making things with your own hands, isn't there? That warm, fuzzy feeling you get when a project comes together is pretty wonderful, and it’s a feeling we all really cherish. Imagine, if you will, creating little bursts of color and texture that brighten up any space or make a thoughtful, handmade gift. Well, you can, and it's easier than you might think, especially with a simple craft like yarn glue heart shapes. This kind of project, you know, it’s perfect for adding a touch of cozy charm to your home or for sharing a bit of handmade love with others, actually.
Crafting with yarn, in a way, offers so many possibilities, from knitting cozy blankets to crocheting cute little animals. But what if you're looking for something that doesn't involve needles or hooks? Something quick, satisfying, and perhaps even kid-friendly? That's where the magic of yarn glue hearts comes in, offering a delightful way to use up those smaller bits of yarn you might have lying around. It's a very simple idea, really, yet it opens up a whole world of creative fun for everyone, pretty much.
These sweet little hearts, you see, are a fantastic project for crafters of all skill levels, even if you're just starting out. They are a wonderful way to bring a bit of cheer and handmade warmth into your surroundings, and they make thoughtful gifts, too. So, if you're ready to explore a charming and uncomplicated craft that uses your favorite yarn, like your Lion Brand Basic Stitch Anti Pilling™ yarn or that lovely Red Heart® Super Saver® Solid yarn, then stick around. We'll show you how to make these adorable yarn glue heart shapes, which are just so versatile, you'll find yourself making them for everything.
- Only Fans Menu
- The Drill That Will Pierce The Heavens Jp
- I Love Atsushi
- 20 Something Lyrics
- Pink Butterfly Wallpaper
Table of Contents
- Why Yarn Glue Hearts?
- Gathering Your Crafting Treasures: What You'll Need
- Shaping Sweetness: The Step-by-Step Guide
- Creative Ways to Display Your Yarn Glue Hearts
- Tips for a Perfect Heart Every Time
- Beyond the Heart: Other Shapes and Ideas
- Frequently Asked Questions
- Wrapping Up Your Crafty Adventure
Why Yarn Glue Hearts?
Making yarn glue heart shapes is a really satisfying project for many reasons. For one thing, it's a fantastic way to use up those smaller yarn scraps that are, you know, too small for a big project but too good to throw away. It's a bit like giving those little bits of fiber a new purpose, which is pretty cool. You can make them in any color, perhaps using some bright Red Heart® Super Saver® Solid yarn, to match your decor or for a special occasion, too.
These hearts are also incredibly versatile, which is a very good thing. They can be decorations, gifts, or even part of a larger craft project. They are pretty sturdy once dry, so they hold their shape well, and you can hang them, glue them onto things, or just scatter them around for a bit of cheer. Plus, since there's no sewing involved, it's a project that many people can enjoy, including little hands that are just learning about crafting, you know.
The process itself is quite calming, and it’s a nice break from more involved projects. You just sort of get into a rhythm, winding the yarn and watching the heart shape appear. It's a wonderful way to relax and be creative without needing a lot of special tools or a big commitment of time. In fact, you can make several of these in an afternoon, which is rather nice for quick decorating needs, or for when you need a bunch of small gifts, you know.
- Words Of Wisdom On Moment
- Blue Gradient Background
- Vogue American Designer 1037 Bill Blass Sewing Pattern
- Harry Potter Trunk
- What Are Symbols For The Word Pain
Gathering Your Crafting Treasures: What You'll Need
Before you start making your beautiful yarn glue heart shapes, it's a good idea to gather all your materials. Having everything ready makes the process smoother and more enjoyable, obviously. You don't want to be halfway through and realize you're missing something important, do you? This project, as a matter of fact, uses pretty basic supplies that you can easily find at your favorite craft store, like Michaels, which is your new creative home for fabric, yarn, sewing supplies, and more.
Yarn Choices
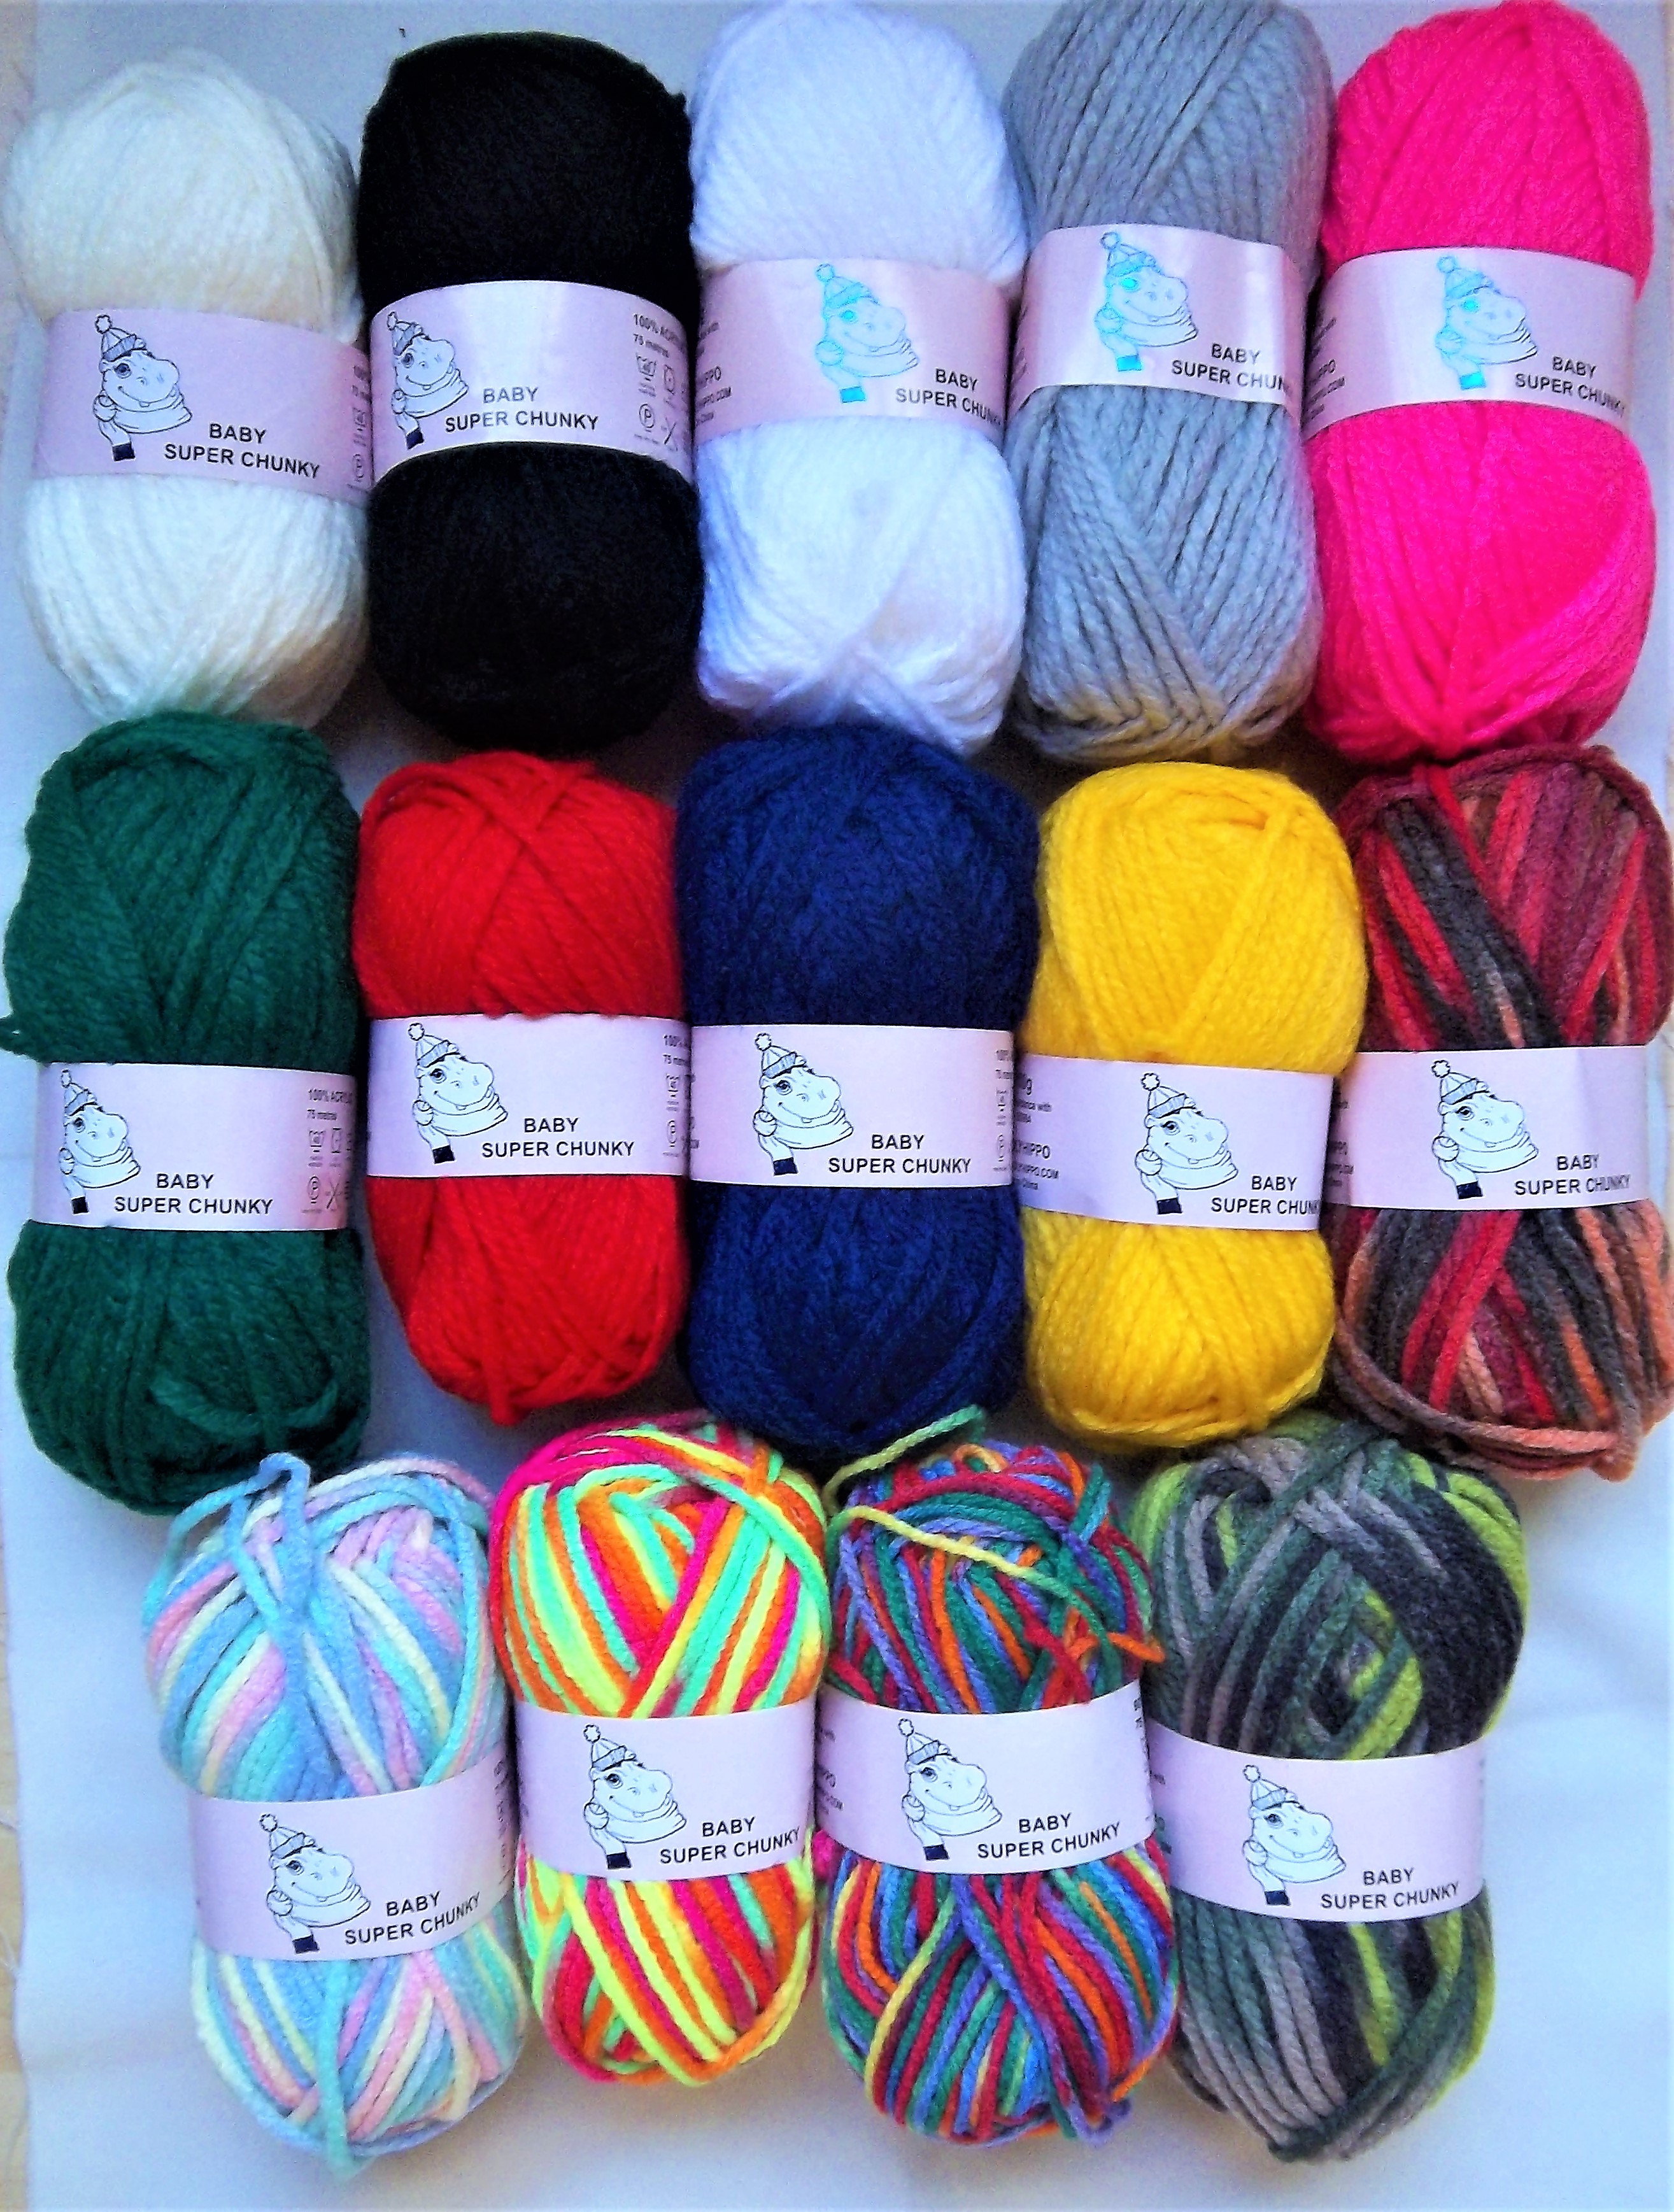
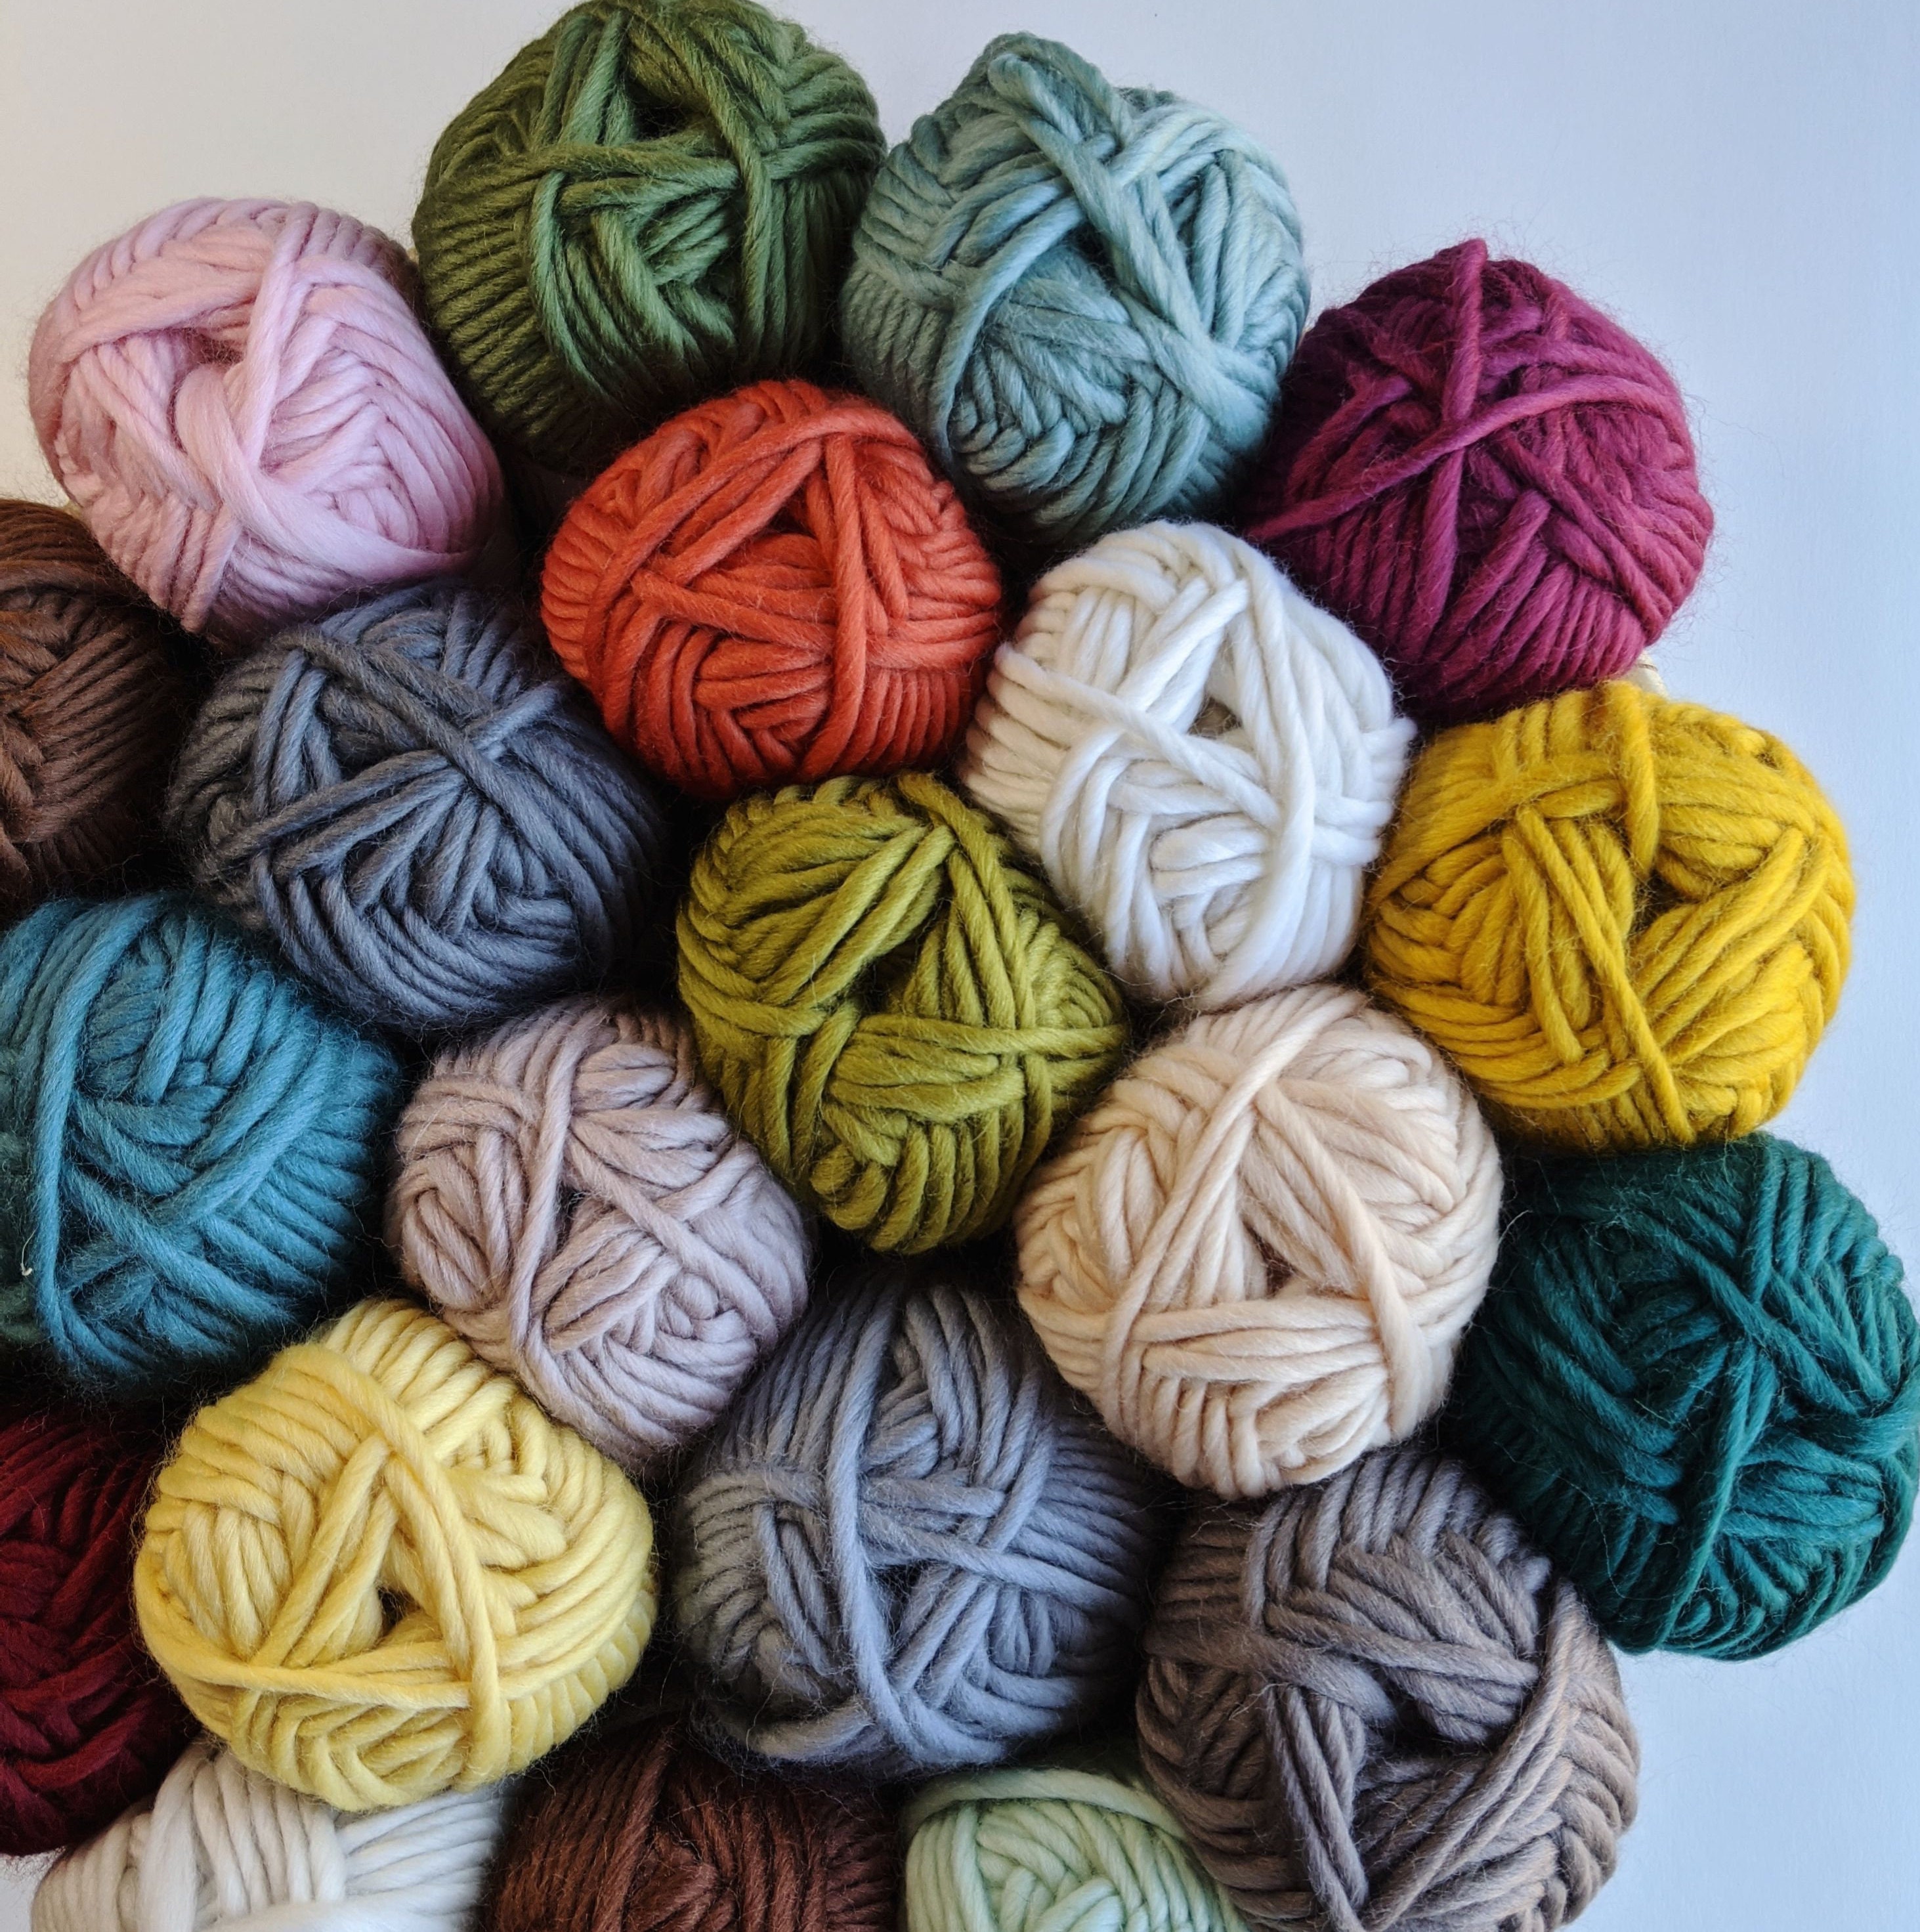
The yarn you pick really sets the tone for your hearts. You can browse all sorts of yarn materials, including basic yarn, home decor yarn, baby yarn, eco and natural blend yarn, and even yarn kits at Michaels. We make it easy to find the yarn brands you love, from Bernat®, Caron®, Lion Brand®, Red Heart®, and Loops & Threads® to Premier®, Craft Smart™, Patons®, and Lily®, too. For these hearts, a classic worsted weight yarn works really well, as it's easy to handle and provides good coverage, you know.
For example, you could use Red Heart® Super Saver® Solid yarn, which is one of America's most recommended yarn brands, and it's available at Michaels. It’s a classic worsted weight that is perfect for making potholders, granny square blankets, knitting projects, and decor items, so it's quite versatile. Lion Brand® 24/7 Cotton® yarn, also at Michaels, would give your hearts a lovely, smooth finish with a nice cotton feel, which is rather durable, too.
If you're looking for something with a bit more texture, the Bernat® Maker™ yarn, available at michaels.com, is a tubular yarn with a pillowy texture and wonderful stitch definition. It comes in a vibrant range of trendy shades, which could make your hearts really pop. Or, perhaps, Classic Cotton™ yarn by Loops & Threads® at Michaels would be a good choice for a very natural, rustic feel, you know. Lion Brand created Basic Stitch Anti Pilling™ yarn, and you can get the 3-pack at michaels.com; it’s great because it resists pilling, keeping your hearts looking neat and fresh for longer, which is a nice bonus.
For a different kind of softness, Caron® Macchiato Cakes™ yarn, found at Michaels, is wonderfully versatile and ideal for afghans, sweaters, hats, and scarves, but it would also make lovely, soft hearts. It’s available in a wide array of colors, too, so you have plenty of options. The key is to choose a yarn that you enjoy working with and that has a good, consistent thickness, you know, so your hearts turn out evenly shaped. You can choose from a huge selection of trusted brands for knitters and crocheters at Michaels, browsing Loops & Threads®, and various weights, from lace and sport weight to worsted and super bulky, too. We provide every type of yarn to suit your yarn or crochet needs, so finding the right one should be pretty easy.
Glue Options
The glue is, quite simply, what holds your yarn glue heart shapes together. You want a clear-drying craft glue that will dry stiff and firm. A good quality white school glue or a fabric stiffener glue works wonderfully for this project. Make sure it's non-toxic, especially if little ones might be helping out or if the hearts will be in a child's room. You'll need enough to really saturate the yarn, so don't be shy with it, you know.
Some people like to dilute their glue a little bit with water to make it easier to work with, especially if it's a very thick glue. Just a tiny splash of water can make it more fluid and help it soak into the yarn better. However, too much water will weaken the hold, so you want to be careful with that. You want a consistency that's easy to paint on but still strong enough to make the yarn rigid when it dries, obviously.
Other Bits and Bobs
You'll also need a few other things to make your yarn glue heart shapes. Wax paper is pretty important because it's non-stick, and your hearts will peel right off it once they're dry. A pair of sharp scissors is also necessary for cutting your yarn cleanly. You might also want a small bowl or container for your glue, and a small paintbrush or foam brush for applying the glue to the yarn, which makes it a lot less messy, you know.
If you plan to hang your hearts, you might want some extra string, ribbon, or even a bit of fishing line. For embellishments, think about glitter, small beads, sequins, or even tiny buttons. These little additions can really make your hearts unique and add a bit of sparkle or extra charm. Having all these little things ready before you start will make the whole crafting process much more enjoyable, as a matter of fact.
Shaping Sweetness: The Step-by-Step Guide
Now that you have all your supplies ready, it's time to actually make your yarn glue heart shapes. This process is pretty straightforward, and it's a lot of fun, too. Just take your time with each step, and you'll have lovely hearts in no time, you know. Remember, there's no right or wrong way to be creative, so just enjoy the process, obviously.
Preparing Your Space
First things first, you'll want to set up a clean, flat work surface. Lay down a sheet of wax paper – or a few sheets, depending on how many hearts you plan to make – on your table. This is very important because the glue will stick to almost anything else, and you want to be able to easily remove your finished hearts. You might also want to put down some newspaper or a craft mat underneath the wax paper, just in case of any drips or spills, which can happen, you know.
Pour a generous amount of your clear-drying craft glue into a small, shallow bowl. If you're diluting it slightly, do that now and stir it gently. Have your paintbrush or foam brush ready, and keep your scissors nearby. You'll want to work in a well-ventilated area, too, especially if you're using a glue with a strong smell, which is something to consider, you know.
Making the Heart Outline
To start your yarn glue heart shapes, you'll need to create the basic heart shape. You can draw a heart outline directly onto your wax paper with a pencil if you want a guide, or you can freehand it. Some people like to use a cookie cutter or a printed template underneath the wax paper as a guide, which can be pretty helpful for getting a consistent shape, especially if you're making a bunch of them. Just trace around it with your pencil, and then remove the template, you know.
Take a length of yarn – about a foot or two is a good starting point, but you'll cut more as you go. Dip this yarn into your glue mixture, making sure it gets completely saturated. You want it wet, but not dripping excessively, you know. Run the yarn between your fingers to remove any excess glue, which helps prevent puddles and makes it easier to handle. Now, carefully lay this glue-soaked yarn onto your wax paper, forming the outline of your heart. Start at the top center, go down to one side, form the point, and come back up to the other side, creating that lovely heart shape. Press it down gently so it sticks to the wax paper, more or less.
Filling in the Heart
Once your heart outline is in place, it's time to fill it in. This is where you can get really creative with your yarn glue heart shapes. Take more lengths of glue-soaked yarn and start laying them inside your outline. You can coil the yarn in a spiral from the center outwards, or you can lay it in concentric circles following the shape of the outline. Some people like to lay the yarn in random, crisscrossing patterns, which gives a very different, more textured look, you know.
Make sure each piece of yarn touches the pieces next to it, and that it's fully coated in glue. You want to build up a solid layer of yarn within your heart shape, without any big gaps. If you have any gaps, just add another small piece of glue-soaked yarn to fill them in. You can use your paintbrush to dab more glue onto any areas that look a bit dry or aren't sticking well. This step is about building density and ensuring your heart will be sturdy once it dries, which is pretty important for its final form, you know.
The Drying Process
After you've finished filling in your yarn glue heart shapes, the most important part begins: the drying. This step takes time, so patience is key. You'll need to let your hearts dry completely, which can take anywhere from 12 to 24 hours, or even longer, depending on how much glue you used and the humidity in your environment. You want them to be completely rigid and dry to the touch, not at all tacky, which is very important for their durability, you know.
Place your wax paper with the hearts in a flat, undisturbed spot where they won't be bumped or moved. A warm, dry room is best for drying. You might even want to gently lift a corner of the wax paper after several hours to check if they are starting to release. If they are still flexible or sticky, they need more time. Rushing this step will result in floppy, disappointing hearts, so just let them do their thing, you know.
Finishing Touches
Once your yarn glue heart shapes are completely dry and stiff, gently peel them off the wax paper. They should come off quite easily. If any bits of glue are still stuck, you can carefully trim them with scissors. At this point, you can decide if you want to add any extra embellishments. Maybe a sprinkle of fine glitter while the glue is still wet, or perhaps some tiny beads glued on after they're dry. You could also attach a small loop of string or ribbon if you plan to hang them, which is a nice touch, you know.
You can also use a bit more glue to attach a small magnet to the back if you want them to stick to a fridge or a metal board. The finishing touches are where you really make these hearts your own, reflecting your personal style or the purpose you have in mind for them. It's the last little bit of magic you add to your creations, and it makes them truly unique, which is pretty special, you know.
Creative Ways to Display Your Yarn Glue Hearts
Once you've made a collection of yarn glue heart shapes, the fun really begins when you start thinking about how to use them. These little beauties are incredibly versatile, and they can add a lovely, handmade touch to so many different things. You might be surprised at all the places they can bring a bit of cheer, honestly.
For instance, you could string several hearts together to create a charming garland. This would look absolutely lovely draped across a mantelpiece, hung in a window, or strung along a shelf. Imagine a garland of soft pink and red hearts for Valentine's Day, or a mix of blues and greens for a spring celebration, you know. It’s a pretty simple way to add a lot of visual interest to a room, too.
They also make wonderful ornaments. You can hang them on a decorative branch, perhaps in a vase, to create a unique centerpiece. Or, for the holidays, they could be sweet additions to a Christmas tree, bringing a touch of handmade warmth to your festive decorations. You could even use them as gift toppers, adding a very personal and thoughtful touch to presents for friends and family, which is always appreciated, you know.
Consider attaching them to handmade cards or scrapbooking pages for a lovely dimensional effect. They add texture and a pop of color that makes your paper crafts stand out. You could even glue them onto plain picture frames to create custom, cozy frames for your favorite photos. It’s a small detail that can make a big difference, you know.
For a child's room, these hearts could be part of a mobile, dangling gently above a crib or bed. Or, they could be glued onto a canvas to create a textured wall art piece, perhaps spelling out a name or a sweet message. You could also make them into magnets for your fridge, which is a practical and pretty way to display them, too. The possibilities are, honestly, quite extensive, so just let your imagination guide you, you know.
Tips for a Perfect Heart Every Time
While making yarn glue heart shapes is pretty simple, a few little tricks can help ensure your hearts turn out perfectly every time. These tips are based on, you know, what works well for many crafters, and they can save you a bit of frustration, actually.
First, don't be afraid to use enough glue. The yarn needs to be fully saturated to become stiff when dry. If you use too little glue, your hearts might be flimsy and lose their shape. However, avoid excessive puddles of glue, as these can take a very long time to dry and might leave a shiny residue. It's a balance, really, and you'll get a feel for it after making a few, you know.
When laying out your yarn, try to keep the strands relatively close together, especially when filling in the heart. This helps create a solid, even surface and prevents large gaps. If you leave too much space between the yarn strands, your heart might look sparse or not hold its shape as well. A little bit of overlapping is fine, but try to avoid big clumps, which can also make drying difficult, you know.
Patience during the drying process is truly a virtue. Resist the urge to touch or move your hearts before they are completely dry. If you disturb them too soon, they might warp or stick to your fingers, ruining their shape. Placing them in a spot with good air circulation can help speed up drying, but don't try to force it with a hairdryer, as this can sometimes make the glue uneven or cause the yarn to frizz, which you don't want, you know.
If you're making multiple hearts, especially for a garland, try to make them roughly the same size. Using a template underneath your wax paper can really help with this consistency. This makes your finished project look more cohesive and professional. Also, consider using yarns of similar weight and texture for a uniform look, or mix them up for an intentionally varied appearance, which can be pretty charming, you know.
Finally, have fun with it! Crafting should be enjoyable, and these yarn glue heart shapes are a very forgiving project. If a heart doesn't turn out exactly as planned, you can always try again, or embrace its unique character. Each handmade item has its own story, after all, and that's part of its charm, pretty much. You can always find more inspiration and supplies, like Lion Brand yarn at Michaels, to unleash your creativity, whether you’re a beginner or an experienced crafter, you know.
Beyond the Heart: Other Shapes and Ideas
While yarn glue heart shapes are absolutely adorable and a fantastic starting point, the technique itself can be applied to many other forms. Once you get comfortable with the process, you might find yourself wanting to experiment with different designs, which is a very natural thing to do, you know. The basic idea of saturating yarn with glue and shaping it on wax paper opens up a whole world of possibilities, actually.
You could try making stars for a celestial theme, or perhaps little flowers for a spring decoration. Simple geometric shapes like circles, squares, or triangles are also very easy to create and can be quite striking, especially if you use different colors of yarn for each. Imagine a garland of colorful yarn glue circles, or a mobile with various shapes dangling from it, you know. These kinds of projects are pretty much only limited by your imagination, honestly.
For holidays, think beyond hearts. You could make little yarn glue pumpkins for autumn, or tiny Christmas trees for winter. The key is to keep the shapes relatively simple and not too intricate, as fine details can be tricky to achieve with yarn. But for larger, bolder shapes, this technique works wonderfully. You could even try making letters to spell out words, which would be a very personalized touch for a bedroom or a party decoration, you know. It’s a creative journey, and you can keep exploring new ways to use your yarn and glue, which is pretty exciting.
Frequently Asked Questions
Here are some common questions people often ask about making yarn glue heart shapes, which might help you out, too.
Can I use any type of yarn for this project?
You can use most types of yarn, but a medium-weight yarn, like a worsted weight, tends to work best. Yarns like Red Heart® Super Saver® Solid yarn or Lion Brand® Basic Stitch Anti Pilling™ yarn are good choices because they hold their shape well once stiffened. Very thin or very thick yarns might be a bit trickier to work with, but you can certainly experiment. The important thing is that the yarn can absorb the glue, which most yarns do quite well, you know.
How long do yarn glue hearts take to dry completely?
Drying time for yarn glue heart shapes can vary, but it usually takes at least 12 to 24 hours. Factors like the amount of glue you used, the thickness of your yarn, and the humidity in your room will affect how long it takes. It's really important to let them dry completely until they are firm and no longer sticky, which ensures they will hold their shape well for a long time, you know. A warm, dry spot is ideal for drying, as a matter of fact.
What can I do if my yarn heart isn't stiff enough after drying?
If your yarn glue heart shapes aren't as stiff as you'd like after drying, you can always add another layer of glue. Just carefully paint more clear-