Have you ever looked at a beautiful flower, perhaps a bright daisy or a soft rose, and wished you could capture its charm on paper? Many people feel that way, you know, but often think drawing is too hard. It can feel a bit like trying to cook a fancy meal from a complex cookbook when all you really want is something simple and satisfying. Yet, creating a lovely flower picture does not have to be a big challenge. It is actually quite doable, even for those who say they cannot draw a straight line.
Learning to draw flowers, particularly simple ones, can bring a quiet joy. It is a way to relax, to use your hands, and to make something pretty without a lot of fuss. Think of it like those quick dinner ideas from Food Network; they get a satisfying meal on the table fast. Similarly, these drawing tips will help you get a satisfying picture on your paper quickly. You do not need special talents or years of practice to start seeing results, which is pretty cool, if you ask me.
Today, we are going to explore how anyone can enjoy the process of creating charming flower drawings. We will break down the steps, so it feels less like a big project and more like a fun activity. Just like making meatloaf with an easy ketchup glaze, where each step builds on the last, drawing flowers is a step-by-step process that leads to something wonderful. So, grab a pencil and some paper, because we are about to make some art, just like that.
- Exterior Window Trim Ideas
- Womens Professional Dj Platform Turquoise And Blue Platform Boots
- Who Does Camille Charriere Hair
- Yotsuba Artstyle
- Betty Boop Drawing
Table of Contents
- Why Draw Flowers?
- Tools You Might Need
- Basic Shapes for Flowers
- Step-by-Step Guides
- Tips for Better Flower Drawings
- Common Questions About Drawing Flowers
- Final Thoughts
Why Draw Flowers?
Drawing flowers offers a unique kind of calm, a bit like unwinding after a busy day with a good meal. It is a simple way to spend some quiet moments. You get to focus on shapes and lines, and for a little while, other worries just fade away. This quiet focus can be very refreshing, you know, for your mind.
Benefits of Drawing
Engaging in drawing, especially something as naturally appealing as flowers, helps with focus. It can improve your hand-eye coordination, too. Also, it gives you a sense of accomplishment, like when you make those flavorful, tender, barbecued nuggets of meat from beef brisket. Even a small drawing can feel like a big win, which is nice.
It is a wonderful way to express yourself without needing words. Sometimes, a simple sketch says a lot. This activity is also very accessible; you do not need much to get started, just a few basic items. This makes it a really easy hobby to pick up and enjoy, almost instantly, that.
- Yellow Smiley Face Phone
- Only Fans Menu
- Star10 Real Madrid Logo
- Watch A Movie At School Clipart
- Rio De Janeiro Meme
Overcoming the Fear
Many people feel a little scared to start drawing. They think they are not "artists" or that their drawings will not look "good enough." But drawing is not just for professionals. It is for everyone who wants to try, basically. Think of it like trying a new recipe; you do not have to be a chef to make something tasty.
The goal here is not perfection, but enjoyment and discovery. We are aiming for something that brings you pleasure. Just like those easy breakfast ideas from Food Network help you start your day deliciously, learning to draw simple flowers can start your creative journey in a delightful way. It is about the process, really, more than the final product.
Tools You Might Need
You do not need a whole art studio to start drawing flowers. A few basic things will do the trick. It is a bit like how some great meals only need a few simple ingredients. You can do a lot with just a little, you know.
Pencils for Drawing
A standard pencil, like the kind you use for writing, works perfectly. If you want to get a little more specific, a set with different hardness levels (like 2H for light lines and 2B for darker lines) can be fun. But honestly, any pencil will let you begin. It is about getting started, you see.
Starting with a lighter pencil helps you make marks that are easy to erase later. This is a bit like using a light hand when seasoning food; you can always add more, but taking it away is hard. So, keep your initial lines soft, just a little.
Paper Choices
Any paper will work to start. Printer paper, a notebook, even the back of an old envelope. If you want something a bit nicer, a sketch pad with slightly thicker paper feels good. The main thing is to have a surface to draw on. Do not let not having "special" paper stop you, that is for sure.
Having plenty of paper lets you practice without worry. You do not have to save your best paper for your first try. Just draw, and if it does not work out, flip the page or grab another sheet. It is all part of the learning, really.
Erasers and Other Bits
A good eraser is your friend. A kneaded eraser is nice because it picks up graphite without damaging the paper. But a regular rubber eraser works just fine, too. It helps you fix little mistakes or lighten lines. It is like having a second chance, you know, which is always good.
You might also want a sharpener to keep your pencil points nice and crisp. That is pretty much it for the absolute basics. You do not need a ton of stuff to make pretty pictures. It is quite simple, actually.
Basic Shapes for Flowers
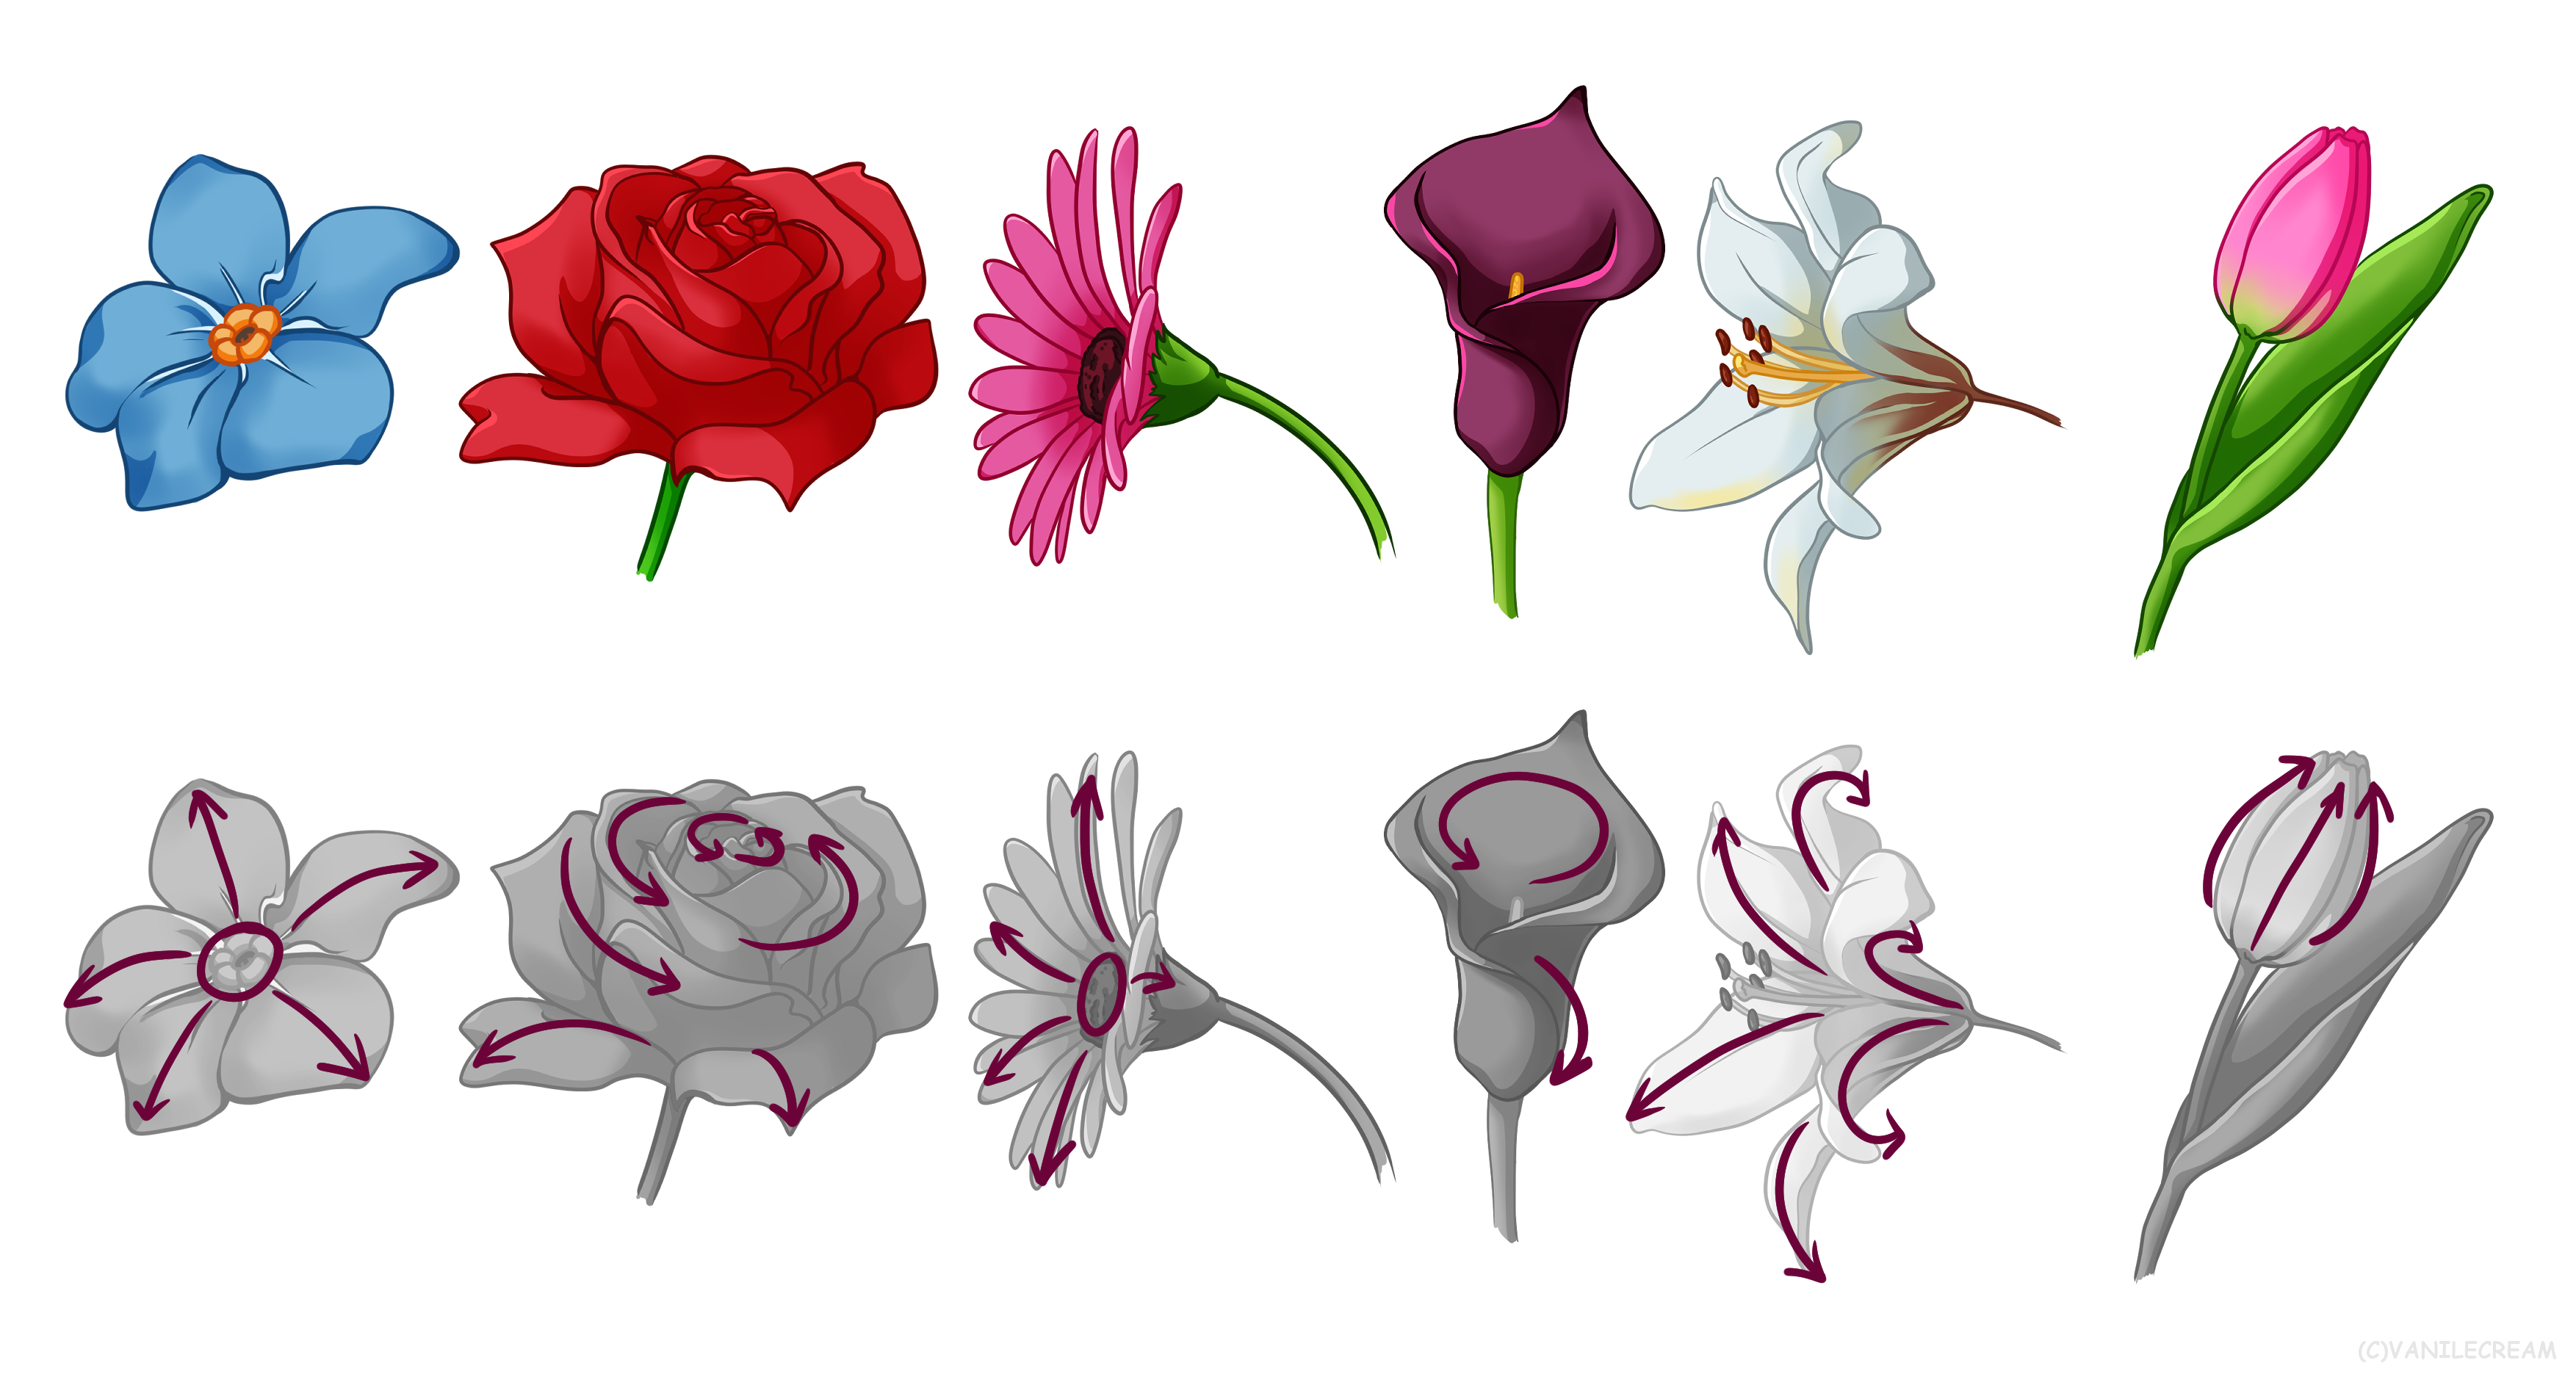
The secret to drawing flowers, especially easy ones, is to see them as simple shapes first. This is a bit like how rice recipes from Food Network make it easy to turn a versatile grain into a savory side or a main dish by adding just a few other ingredients. Basic shapes are your versatile "ingredients" for drawing flowers, apparently.
Circles and Ovals
Most flowers start with a circle or an oval. The center of a daisy is a circle, and the overall shape of a rose can be an oval. These shapes act as guides for where your petals will go. Draw them lightly, as you will erase them later. They are just there to help you place things, you know.
Think of these as the foundation. Without a good foundation, things can get wobbly. So, a nice, light circle or oval is your first step to a well-balanced flower. It really helps keep things organized, more or less.
Lines and Curves
Petals are mostly made of curved lines. Some petals are wide and round, others are long and narrow. Practice drawing different kinds of curves. Some might look like gentle hills, others like little waves. These lines will give your flowers their unique character, that is for sure.
Stems are usually straight or gently curved lines. Leaves are often made of two curved lines that meet at a point. By combining these basic lines and curves, you can build up almost any flower shape. It is really quite clever, when you think about it.
Step-by-Step Guides
Now for the fun part: putting those shapes and lines together. We will start with some very simple flowers. It is like getting Food Network Kitchen’s classic shrimp scampi recipe; you follow the steps, and you get a great result. These are your classic flower recipes, in a way.
How to Draw a Simple Daisy
First, draw a small circle in the middle of your paper. This will be the center of your daisy. Keep it light. This circle is your starting point, your anchor, so to speak.
Next, draw petals around this circle. Each petal is like a long, narrow oval or a curved tear-drop shape. Make them slightly different sizes and angles to give your daisy a natural look. Do not worry about them being perfect, actually.
Draw a second row of petals behind the first, peeking out from between the front petals. This adds fullness to your flower. It makes it look a bit more lively, you know.
Add a stem with a couple of simple leaves at the bottom. Erase your initial circle guide. You now have a lovely daisy! It is pretty simple, right?
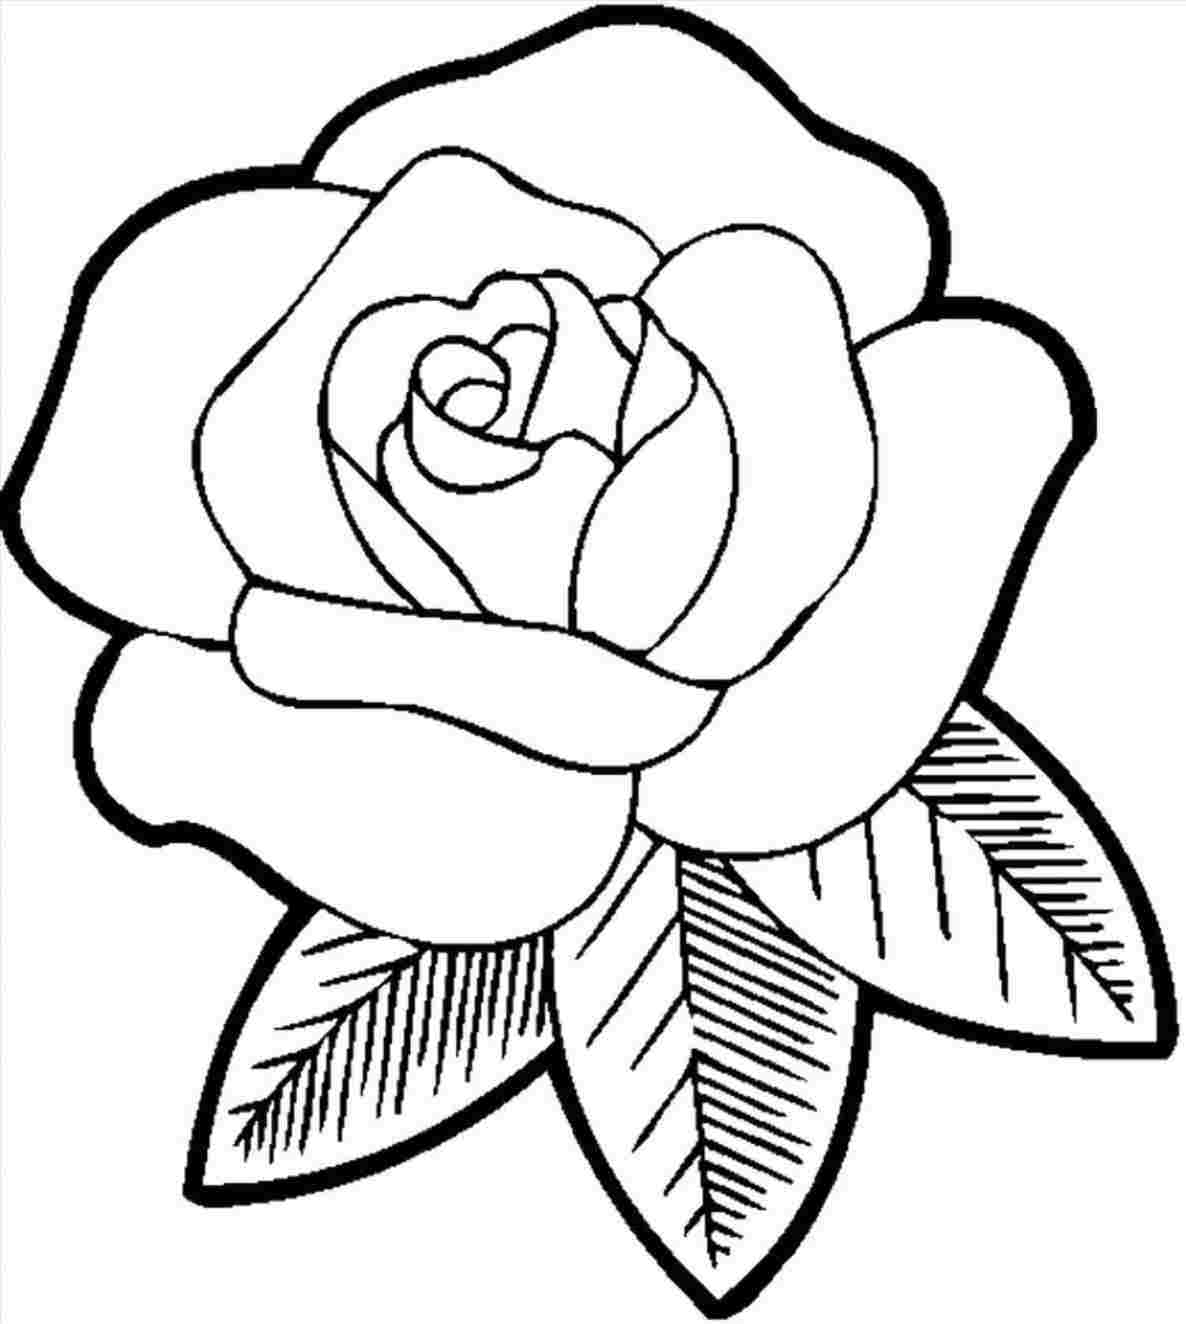
How to Draw a Basic Rose
Start with a small spiral shape in the center of your paper. This is the very heart of your rose. It does not need to be neat, just a little swirl, sort of.
Around this spiral, draw curved lines that look like petals unfolding. Think of them as soft, wavy C-shapes or U-shapes. Overlap them slightly. These are your first few inner petals, basically.
Continue adding more curved lines, making the petals larger as you move outwards. Let some petals curl over at the edges. This gives the rose its signature look. It is quite a satisfying process, really.
Add a stem and a few leaves with jagged edges. Erase any extra lines. You have a simple rose! It is almost like a secret trick, you know, to make something so pretty from simple curves.
How to Draw a Tulip
Begin by drawing an oval shape for the main part of the flower head. This will be the body of your tulip. It is your guide, in a way, for the overall size.
Inside the oval, draw three petal shapes. Two petals will be on the sides, curving slightly inwards. The third petal will be in the middle, slightly behind the first two, peeking up. These are the main petals, you see.
Add a long, straight stem coming down from the bottom of the oval. Tulips have very distinct, long leaves. Draw two long, broad, slightly curved leaves coming from the base of the stem. They often wrap around the stem a little, apparently.
Erase your initial oval guide. You have a graceful tulip! It is quite elegant, actually, with just a few lines. This is a very satisfying flower to draw, too it's almost.
Tips for Better Flower Drawings
Just like any skill, drawing gets easier and more fun with a few simple practices. These are not strict rules, just helpful ideas. They are like those little secrets Food Network shares, the ones that make cooking much simpler. Drop them in boiling water for four minutes and you're practically done; it is that kind of easy tip, you know.
Start Light and Build Up
Always begin your drawings with very light lines. These are your "sketch" lines, your guides. You can barely see them. If you make a mistake, they are easy to erase without leaving marks on your paper. This gives you freedom to adjust, which is really important.
Once you are happy with the basic shape, you can go over your lines with a bit more pressure to make them darker and clearer. This layering approach helps you build confidence. It is a good way to work, honestly.
Observe Real Flowers
Look at real flowers, or even pictures of them. Notice how the petals overlap, how the leaves attach to the stem, and the overall shape of the flower. You do not have to copy them exactly, but observing helps your drawings look more natural. It gives you ideas, you know.
You might notice little details, like how a petal curls or how light hits a certain part. These observations can make your simple drawings even better. It is about seeing, really, and then putting what you see onto paper, in a way.
Practice Regularly
The more you draw, the better you will get. Even just five or ten minutes a day can make a big difference. It is like any skill; consistency helps you improve. Do not worry about every drawing being a masterpiece. It is about the journey, you see.
Keep your sketchbook handy, or just a few loose sheets of paper. Draw whenever you have a moment. This makes drawing a natural part of your day, like a quick, satisfying meal. It really does help build up your ability, quite a bit.
Add Your Own Touch
Once you feel comfortable with the basic shapes, try adding your own style. Maybe you like drawing petals with a bit more curve, or adding a pattern to the center of your daisy. Your drawings do not have to look exactly like anyone else's. This is your art, after all.
Experiment with different ways to shade or add color if you want. There is no right or wrong way to make art. It is about what feels good to you and what you enjoy creating. That is the whole point, honestly.
Common Questions About Drawing Flowers
Here are some things people often ask when they are learning to draw flowers:
What are the easiest flowers to draw for beginners?
Daisies are often considered the simplest. Their clear center and distinct petals make them easy to outline. Tulips and simple five-petal flowers, like those you might see on a children's drawing, are also great for starting out. They have very clear shapes, you know, which helps a lot.
Do I need special art supplies to draw flowers?
No, not at all. A regular pencil and any paper will let you start drawing right away. While fancier supplies can be fun later, they are not needed to learn the basics. It is about the practice, not the tools, basically.
How can I make my flower drawings look more realistic?
To add a touch of realism, try to observe real flowers closely. Notice how light hits them and creates shadows. Adding simple shading can give your flowers depth. Also, making petals slightly uneven, like in nature, helps a lot. It is about those little details, you know, that make a big difference.
Final Thoughts
Starting with easy drawing of flowers is a rewarding way to bring a little creativity into your life. It is not about being perfect, but about enjoying the process and seeing what you can create. Just like finding your favorite recipe, finding your drawing style takes a little time and a lot of fun experimentation. Learn more about simple creative activities on our site, and check out our tips for starting new hobbies. Keep drawing, and watch your skills grow, because they will, you know.
- Beach Drinks
- Biblical Games
- Turban Shell Helmet
- Glitter Ombre Nails
- Womens Professional Dj Platform Turquoise And Blue Platform Boots